
SAHL2 Tools | Determine Mounting Height of DSS using SAHL 2
The mounting height of the DSS sensors must be measured as follows to determine the final position (top or bottom hole mounting position):
- Measure the mounting height of the DSS with SAHL 2 when mounting directly to the rail or, on the SSK 6, predetermine the mounting height with the SAHL 2
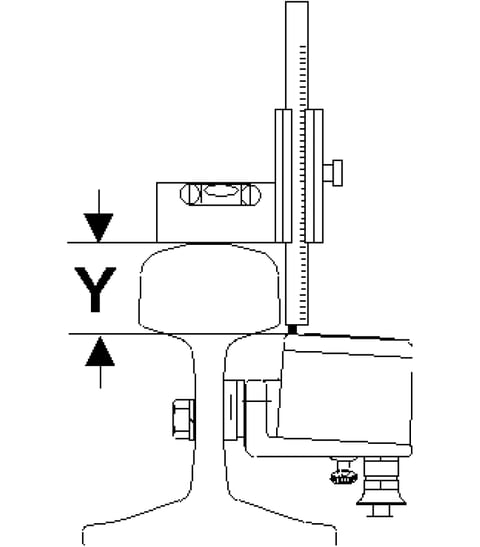
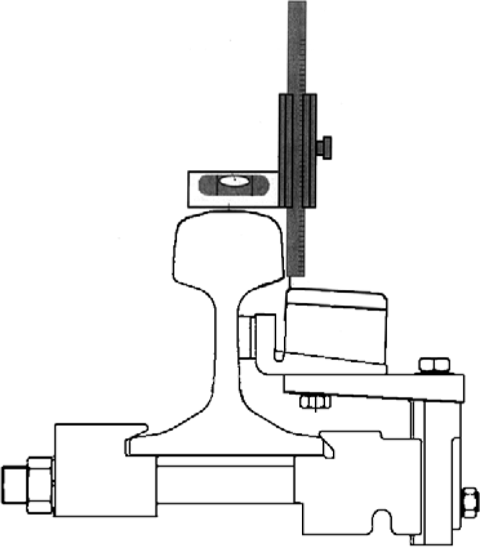
Fig. 1 Checking the mounting height of the DSS sensor with SAHL 2
On new rails without wear, the mounting height -Y- is 45 mm below the rail top edge. The only exception is the DSS type 401 where the casing is 3 mm higher 42 mm from the rail top edge. Allowable mounting height and position is determined by section 8 in conjunction with section 6 of table 1
When using the SSK 6, in case of worn rails (not new), set the height –Y– with SAHL 2 (see 0) which calculates as the difference of 45mm - measured feeler dimension –X–. The dimension –X– should be measured with a big sliding calliper.
- Measure the mounting height of the DSS with SAHL 2 when mounting directly to the rail or, on the SSK 6, predetermine the mounting height with the SAHL 2
- Push the sensor up to the SAHL 2 until it starts to make contact; then, fasten the sensor via the SSK6 claw. If necessary, loosen the sensor at the lateral position once more so that the plastic spacer plates make complete contact with the rail stem (due to the stem bulge).
Avoid altering the position of the sensor when tightening the SSK 6 screws. If the position is altered, measure and adjust once more. Do not mount the wheel sensor in an area of the rail which has raised letters unless you grind these letters down flush with the web of the rail.